Have you ever thought of repurposing your written blog to video and publish them on Youtube ? Or if you are simply are a writer who has never found the courage to record your own videos or even audios, for that matter, Pictory AI, brings you a solution where you can simply paste your text, and create videos within minutes.
- Who is Pictory AI for ?
- 1. Choose the type of content you would like to repurpose on the Pictory AI platform.
- 2. Paste your script and enter the title of the video.
- 3. Choose the style and template of your blog to video.
- 4. Customize your video in the platform’s editor to get the exact look and feel you want.
- 5. Publish your video and share it with your audience.
- CLICK HERE TO JOIN PICTORY.AI
Who is Pictory AI for ?
Gone are the days, when the three essential pillars of becoming a Youtuber were camera, microphone and confidence. If you are anything like me, the idea of recording my own self speaking in front of the camera is quite a dreadful task. But thanks to AI technologies, not only has the process become way more easy, but you can kill two birds with one stone. That is – write a blog, and use the same content to create videos. You’d be amazed how easy this thing, once you pass the initial hassle of creating your account, logging in and creating your very first video. Pictory AI is ideal for the following types of creators :-
- If you make voice-over primary videos. Any educational style content, that doesn’t require additional visual illustration is best to be made using Pictory.
- If you want efficient content creation. Time is a huge concern for working professionals. If you don’t have an extra hour or two for editing videos manually, the workflow is ideal for you.
- If you’re a blogger or writer, looking to venture forth into the world of Youtube and other video sharing platform, Pictory cl helps you close the gap between writing and content creation.
Here’s a step by step breakdown on how this works. Keep in mind, that I’m using a free account to demonstrate the above :-
1. Choose the type of content you would like to repurpose on the Pictory AI platform.

Immediately after logging in, you’ll see the screen in the image video. Here are the 4 types of content you can repurpose to a video.
- Script to Video
- Educational Videos where you are discussing concepts. This is for videos, where the audio is far more important than the visuals. E.g. Psychology, Spirituality
- Listicle Videos, that focus primarily on delivering content in list form. These include Top 10 styles of videos or rank style videos, where the overall format is listing content.
- Coaching videos, that focus on delivering tutorials. Although, this style of videos, requires quite a bit of manual editing, and custom videos to be inserted, for accurate representation of information.
- Step by step guides on
- Article to Video.
- You can easily convert existing blog posts into videos.
- Press Releases to videos.
- You can also convert any HTML article to video.
- Edit Video using Text.
- This option is for editing existing videos, especially the kind that you record using your own camera.
- You can easily transcribe the audio and convert it to subtitle for better engagement.
- You can cut and highlight some portions of the video.
- You can also add the final touch to complete video, by adding a logo, and adding an intro and outro portion to it.
- Visuals To Video.
- You can upload your own visuals, images or videos, for enhanced experience.
In this step by step tutorial, we are going to focus on the script to video format, which is the main feature of Pictory AI.

2. Paste your script and enter the title of the video.
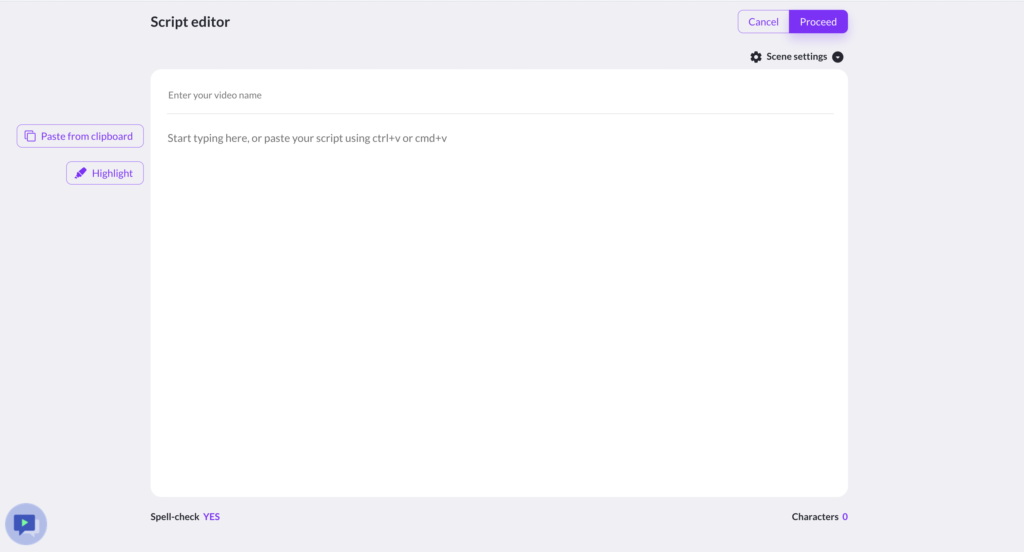
For this current sample, I’m using a script on “How to Find Motivation To Chase Your Dreams”, which I’ve pasted in the form, in the following manner.
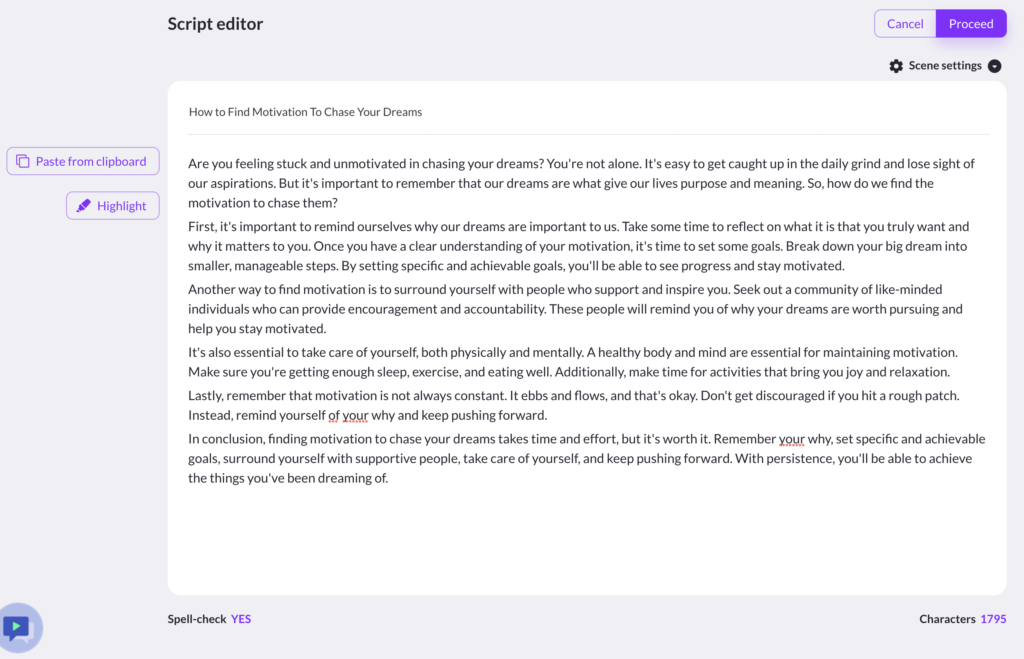
It’s a very basic script, I’ve created in order to demonstrate. Pictory allows upto 10 minutes of video export in the free version which is slightly difficult to quantify in terms of word count. I would try to keep the word count, under 3000, to avoid running into this limit issue. After you’ve pasted your script, click “Proceed”.

3. Choose the style and template of your blog to video.
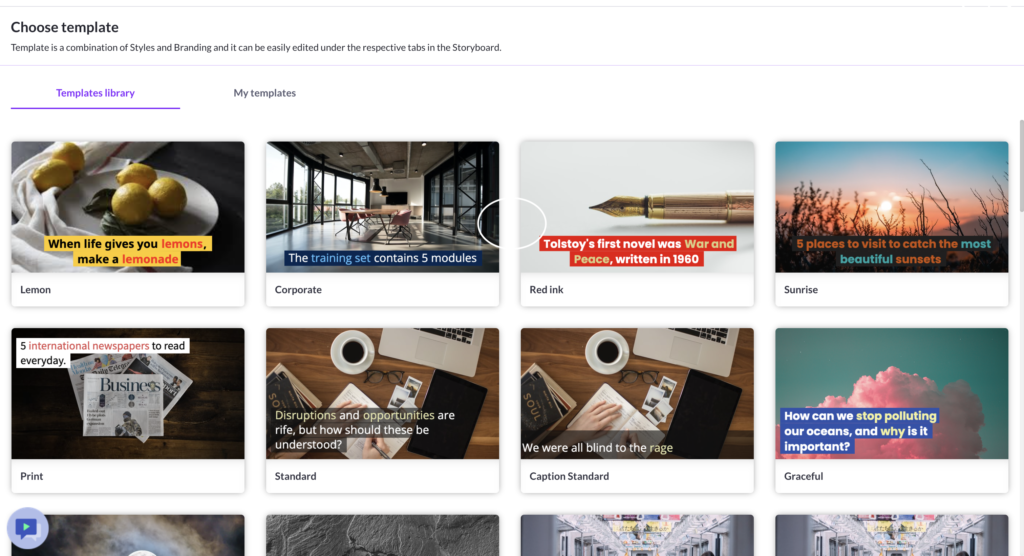
In this step, you’ll get to choose among several pre-made templates, for your convenience. Depending on the style of your content, you can go for a sleek “corporate” look if you’re looking to create a tutorial or training style video, or go for the sunrise template if your video is about places or travelling. Keep in mind, that this is just a guideline. It doesn’t really matter as all of the templates are fairly versatile.
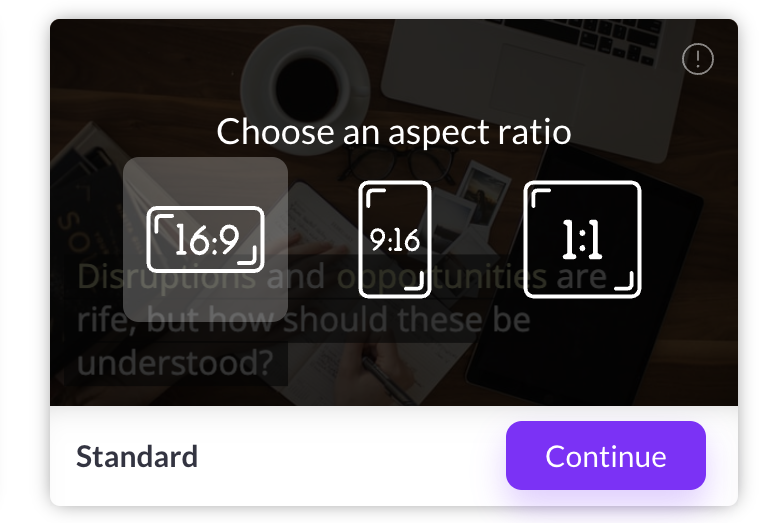
I have chosen the “standard” template to keep things simple. Further, you’ll have to choose among three different aspect ratios, depending on where you’d want to publish your video. The standard 16:9 is for Youtube and other platforms supporting long form style. The 9:16 is for vertical videos, popularly used for Youtube shorts and Tiktok videos. The 1:1 is best for Instagram, although you can also it for shorts. After clicking on “Continue”, the software will take a few minutes to create your scenes, depending on the length of your script.

4. Customize your video in the platform’s editor to get the exact look and feel you want.
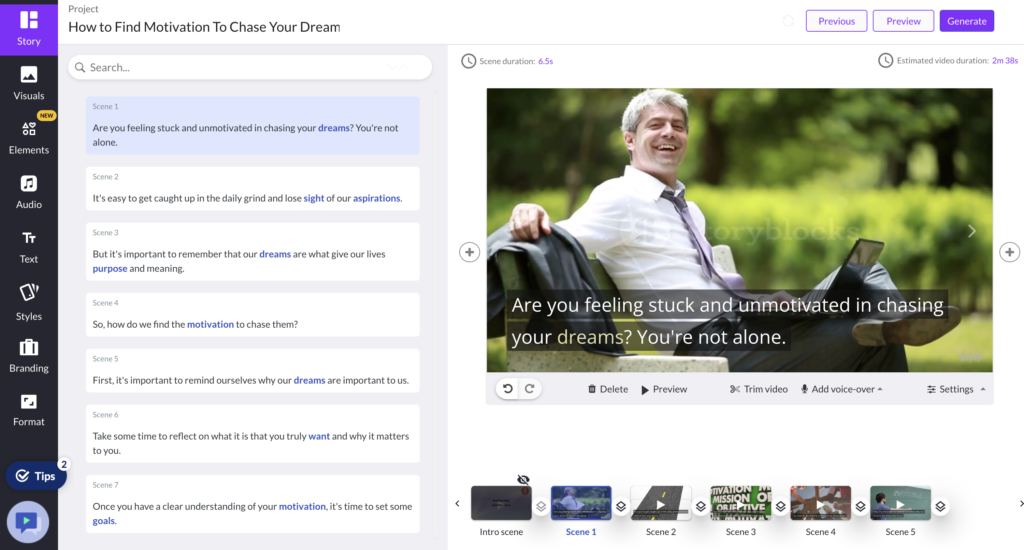
This step allows you to customise your scenes, before the final export. You can alter some of the sentences if you want to do, and also change the videos of the corresponding scene.
Adjusting the Length Of The Video
The top right corner above the video, contains the estimated video duration which is “2 minutes 38 seconds” in this case, and this particular scene has a duration of 6.5 seconds, as denoted by top left corner above the video. You can adjust the total length or the video by either adding or removing scenes, or changing the length of the sentences.
As you can see, the left column is showing you a quick list of all script sentences, broken individually into “scenes” by sentences.
How the AI chooses videos for each scene
The blue highlighted words in each of the scenes, is automatically chosen by the AI and is used to find videos corresponding to it, for each of the scenes. The video of the man smiling corresponds to the highlighted word “dreams”. Pictory has a library of thousands of videos to choose from. So, the chances of you running into repeating video scenes is quite low. However, one can’t expect to find super specific videos on niche topics, as the possibilities would be endless.
Adding your own or automated voice-overs
Hovering your mouse pointer, over the “Add voice-over” will allow you choose between “Record voice-over” and “Upload voice-over” . The “Record voice-over” option will allow you to directly record your own audio using the browser itself (assuming you have a microphone connected). On the other hand, “Upload voice-over” will open a set of menus on the left hand side, from which you can alter the background music, upload pre-recorded voice overs or add automated voiceovers to the video.
Changing the settings of the video
Hovering your mouse, over the setting section of the video. You can alter the following options from the settings menu,

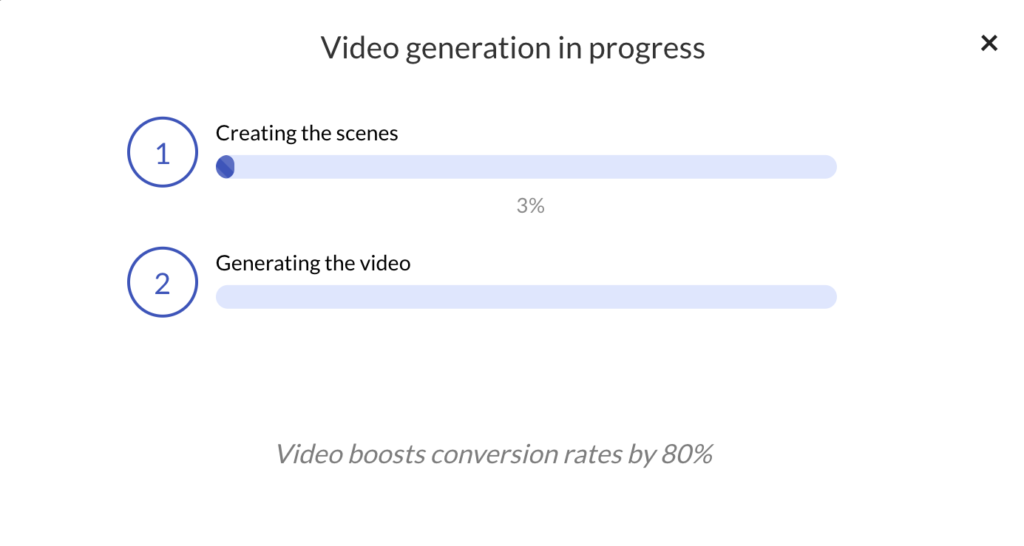
After clicking on Generate -> Video, you’ll encounter the following window. All you have to do is now wait for the 2 steps to get completed and watch the magic happen.

5. Publish your video and share it with your audience.
The entire workflow is super easy compared to drag and drop editing in any standard video editor that uses timelines. If you’re a
The great thing about Pictory AI is that the platform is designed to make the entire process as easy and hassle-free as possible. You don’t have to be a tech whiz or have any video production experience to create amazing videos with Pictory AI. Plus, you can access a library of high-quality images, GIFs, and music to make your videos even more engaging.
So, if you’ve been hesitating all your life to make videos, whether due to confidence related issues or simply a busy schedule, you have zero excuses to start your own channel.
Join Pictory AI Now:
